
Terrace Waterproofing Solutions in Thane: Complete Guide to Leakage Repair, Cost & Contractors (2026)
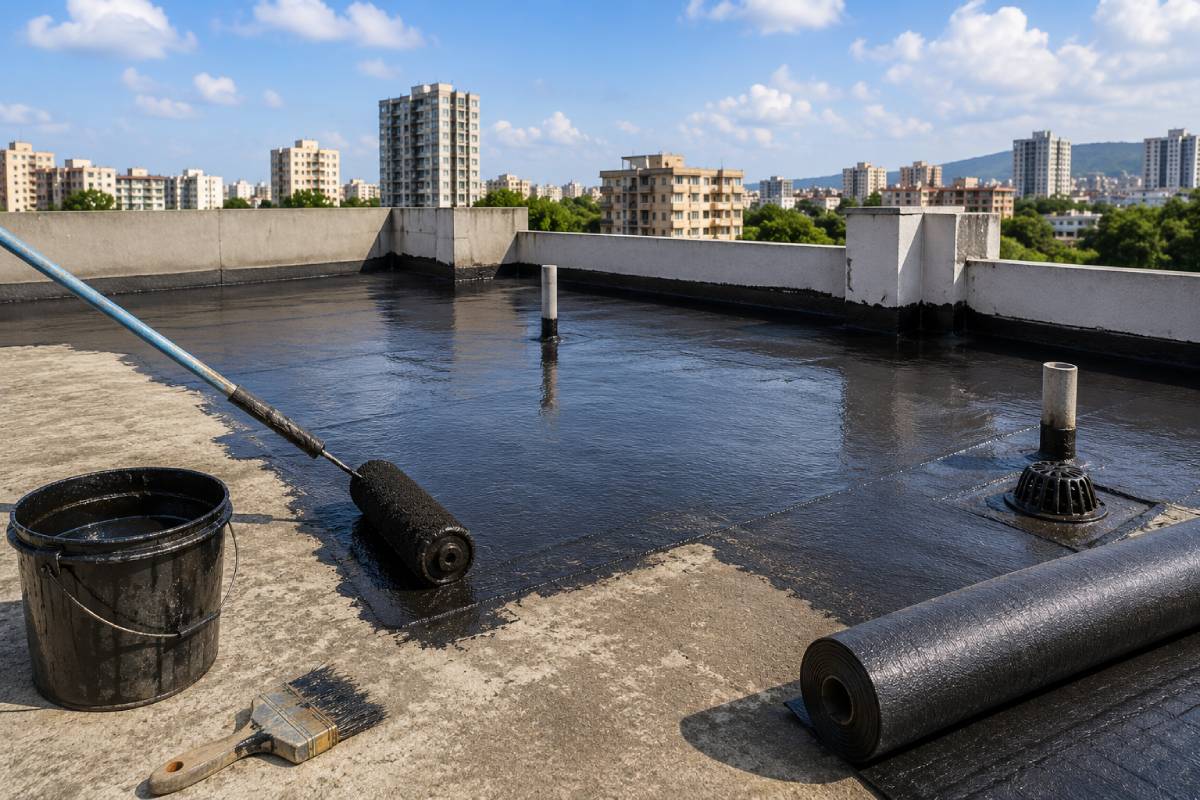
Part 1 - Terrace Leakage Causes, Failure Signs & Professional Inspection
Terrace waterproofing is often treated as a repair that can be postponed until water starts entering the rooms below. In reality, by the time visible leakage appears on the ceiling, the terrace system may already have been allowing moisture to penetrate for some time.
For homeowners considering terrace waterproofing in Thane, this becomes especially important before the monsoon. A terrace that looks acceptable during dry weather can develop serious leakage once prolonged rainfall exposes cracks, failed joints, blocked drainage points, damaged waterproofing layers or areas where water is ponding.
This guide takes a complete approach to terrace waterproofing solutions. Instead of recommending one chemical or one method for every terrace, it explains how to identify the cause, inspect the surface, select an appropriate waterproofing system, understand the execution process, evaluate repair versus complete re-waterproofing, estimate cost and select reliable terrace waterproofing contractors. The overall approach follows the problem-solving journey defined in the content brief: Problem → Inspection → Cause → Solution → Method → Cost → Repair → Contractor → Execution → Warranty.
Why Terrace Waterproofing Should Be Done Before the Next Monsoon
A terrace is continuously exposed to weather conditions that interior surfaces do not experience. It receives direct rainfall, sunlight, temperature fluctuations and repeated wetting and drying. Over time, these conditions can affect waterproofing layers, joints, surface coatings and vulnerable points around drains, parapets and pipe penetrations.
When water begins entering the structure, the visible damage may appear somewhere completely different from the actual source. A damp patch on the ceiling below, for example, does not necessarily mean that the corresponding point directly above it is the leakage source.
This is why terrace waterproofing before monsoon should ideally begin with inspection rather than waiting for the first major rainfall.
What Can Happen When Terrace Leakage Is Ignored?
A small leakage may initially appear as a minor stain.
But repeated water penetration can contribute to:
- Damp ceiling patches
- Brown or yellow staining
- Peeling paint
- Bubbling paint
- Damp walls
- Mold or unpleasant odour
- Efflorescence
- Deterioration of plaster
- Damage to interior finishes
- Concrete-related deterioration in affected areas
The content brief specifically identifies rainwater penetration, ceiling leakage, damp walls, concrete deterioration, repeated repairs and interior damage as important consequences to explain in this section.
The financial impact can also increase if the problem is allowed to continue.
A homeowner may first repair the ceiling below, then repaint it, only to discover that the same stain returns during the next rainfall. The underlying terrace problem has not been solved; an effective terrace leakage solution addresses the source rather than only the visible symptom.
What Is Terrace Waterproofing?
Terrace waterproofing is a system designed to reduce or prevent rainwater and moisture from penetrating through the terrace surface into the building structure and occupied spaces below. It should not be understood simply as applying terrace waterproofing chemicals over concrete.
A properly planned system involves several coordinated components, including:
- Surface preparation
- Crack treatment
- Waterproofing membrane or coating
- Reinforcement at vulnerable areas
- Drainage correction
- Joint treatment
- Pipe-penetration treatment
- Protective layers
- Testing
The appropriate combination depends on the condition of the existing terrace and the waterproofing system being selected. The attached brief specifically identifies waterproofing membrane, concrete protection, moisture penetration, drainage, surface preparation and protective layers as areas that should be explained.
Waterproofing Is a System, Not Just a Chemical
One of the most common misconceptions about terrace waterproofing chemicals is: “Which waterproofing chemical is the best?” That question is incomplete.
The chemical or membrane is only one component of the solution. If the surface is poorly prepared, cracks are ignored, drainage is blocked or water continues to pond, even a technically suitable waterproofing material may not deliver the expected result.
A better approach is: Inspect → Diagnose → Prepare → Repair → Waterproof → Test → Protect
This is why the quality of the installation process can be as important as the material selected.
Why Does a Terrace Start Leaking?
There is rarely one universal reason for terrace leakage. A terrace can leak because of a combination of surface deterioration, drainage problems, movement, failed previous waterproofing or poor workmanship.
The attached brief identifies several major causes that should be addressed, including cracks, failed old waterproofing, poor slope, water ponding, blocked outlets, damaged joints, parapet-wall leakage, pipe penetrations, thermal movement and poor previous workmanship. Understanding the cause is critical because the treatment should address the actual failure mechanism.
Cracks in the Terrace Surface
Cracks are among the most obvious warning signs. They may develop because of movement, shrinkage, aging, surface deterioration or other building-related conditions. Not every visible crack has the same significance.
A superficial surface crack may require a different treatment from a wider or repeatedly moving crack. The location, width, pattern and surrounding condition should therefore be assessed before deciding on the repair. Simply filling a crack with a surface coating without understanding why it appeared can result in repeated failure.
Failed or Deteriorated Old Waterproofing
Many terraces have already been waterproofed at some point.
Over time, the old system may:
- Peel
- Crack
- Lose adhesion
- Become brittle
- Deteriorate under exposure
- Develop weak joints
If the old waterproofing layer has broadly failed, applying another coating over it without proper preparation may not provide a reliable long-term solution.
The existing system needs to be inspected to determine whether it can be repaired, prepared and recoated or whether more extensive removal and replacement is appropriate.
Poor Terrace Slope
A terrace needs to direct rainwater toward its drainage outlets. If the slope is inadequate, water may remain on the surface after rainfall. This is known as water ponding.
Persistent ponding places additional stress on the waterproofing system and can expose weak points for longer periods. Therefore, waterproofing and drainage should not be treated as completely separate problems.
Blocked Drainage Outlets
Even a properly sloped terrace can experience problems if the drainage outlets are blocked.
Common causes include:
- Leaves
- Dust
- Construction debris
- Sediment
- Vegetation
When water cannot leave the terrace efficiently, it accumulates. This is why drainage inspection should be part of terrace waterproofing assessment rather than an afterthought.
Damaged Joints
Joints are vulnerable areas because they can experience movement and may become pathways for water.
These can include:
- Construction joints
- Expansion joints
- Junctions between different surfaces
- Parapet-to-floor junctions
A waterproofing system needs to address these areas appropriately rather than treating the terrace as one completely uniform surface.
Parapet Wall Leakage
The terrace floor is not the only potential source of leakage. Parapet walls and their junction with the terrace surface can also become vulnerable.
Water can enter through:
- Cracks
- Failed joints
- Poor detailing
- Damaged surface coatings
If only the horizontal terrace area is waterproofed while vulnerable parapet junctions are ignored, leakage may continue.
Pipe Penetrations
Terraces often contain pipes, service outlets and other penetrations. Every penetration creates a transition between different materials and surfaces.
These areas need careful detailing because gaps, cracks or failed sealants can provide a path for water. During inspection, contractors should identify every relevant penetration rather than focusing only on visible cracks.
Thermal Movement
Terraces experience significant temperature variation. The surface heats up under sunlight and cools when temperatures fall or after rainfall. Repeated expansion and contraction can contribute to movement and stress within certain materials and joints.
This is one reason flexibility can be an important consideration when selecting certain waterproofing systems. The correct solution depends on the actual surface, movement characteristics and system specifications.
15 Signs Your Terrace Waterproofing Has Failed
One of the strongest parts of this article should be the ability to help homeowners recognize failure before the problem becomes larger. The following signs should not automatically be interpreted as proof of one specific waterproofing failure. Instead, they should be treated as inspection triggers.
The attached brief specifically recommends a 15-sign section covering ceiling dampness, stains, peeling paint, cracks, ponding, loose tiles, damaged grout, mold, efflorescence, damp smell, parapet seepage, leakage after rain, repeated repairs and peeling waterproof coating.
Dampness on the Ceiling Below the Terrace
A damp patch appearing on a ceiling directly below or near a terrace should be investigated. It can indicate moisture penetration from above, although the actual source may not be directly above the visible patch. Inspection should include the terrace surface, drainage, nearby joints and service penetrations.
Brown or Yellow Ceiling Stains
Discoloration often becomes visible after repeated moisture exposure. A stain that becomes darker after rainfall deserves particular attention. Repainting without identifying the moisture source can result in the stain returning.
Peeling Paint
Paint can peel when moisture gets behind the finish. If the source of moisture remains active, repainting the affected area may provide only a temporary visual improvement. The underlying wall or ceiling should be assessed before finishing work is repeated.
Bubbling or Blistering Paint
Bubbles or blisters can indicate moisture trapped beneath the paint layer. The affected area should be opened or inspected appropriately to determine whether moisture is still present. This is particularly important when the damage repeatedly appears after rainfall.
Visible Terrace Cracks
Cracks on the terrace surface should be documented during inspection. Their location, size and pattern can help determine what type of treatment may be appropriate. Not every crack requires the same waterproofing method.
Water Ponding After Rain
If water remains on the terrace for extended periods after rainfall, drainage or slope should be assessed. Repeated ponding can expose waterproofing surfaces to prolonged moisture. The solution may require drainage cleaning, slope correction or another intervention depending on the cause.
Loose Terrace Tiles
Loose tiles can indicate problems beneath the finished surface. Possible contributing factors can include poor adhesion, moisture or deterioration of the underlying system. Removing and replacing individual tiles without checking the underlying condition may not solve the larger problem.
Damaged or Open Grout Joints
Grout deterioration can create vulnerable points through which water can reach lower layers. However, simply replacing grout does not necessarily mean the underlying waterproofing is restored. The condition of the complete system should be evaluated when leakage is present.
Mold or Fungal Growth
Persistent moisture can create conditions conducive to mold or fungal growth. If such growth appears repeatedly, especially in conjunction with dampness, the source of moisture should be investigated. Cleaning the visible growth without addressing the water source is unlikely to solve the underlying issue.
Efflorescence
White powdery deposits on masonry or concrete surfaces can be associated with moisture movement through materials. The presence of efflorescence should therefore encourage further inspection. It is a symptom that needs context rather than an automatic diagnosis of a particular waterproofing failure.
Persistent Damp Smell
A recurring damp smell can indicate continued moisture within a space. This can become particularly noticeable after rainfall. Where a terrace is above the affected area, the terrace and surrounding waterproofing details should be inspected.
Parapet Seepage
Dampness around parapet walls can indicate leakage at the wall or its junction with the terrace. This area should be examined separately rather than assuming that the main terrace surface is the only problem.
Leakage Appearing After Rainfall
Timing is an important diagnostic clue. If leakage consistently appears after rainfall, the terrace drainage and waterproofing system deserve detailed inspection. The location and delay between rainfall and visible leakage can also provide useful information to an experienced contractor.
Repeated Monsoon Repairs
If the same ceiling or wall has been repaired every monsoon, the repeated repair itself is a warning sign. It may indicate that previous interventions treated the visible symptom rather than the underlying cause. At that point, a complete terrace assessment may be more appropriate than another isolated patch repair.
Waterproofing Coating Is Peeling
Peeling, flaking or visibly deteriorated waterproofing indicates that the existing system may no longer be performing as intended. Before applying a new layer, the condition of the existing coating and its adhesion should be assessed. Simply covering a failing surface can transfer the problem into the next waterproofing layer.
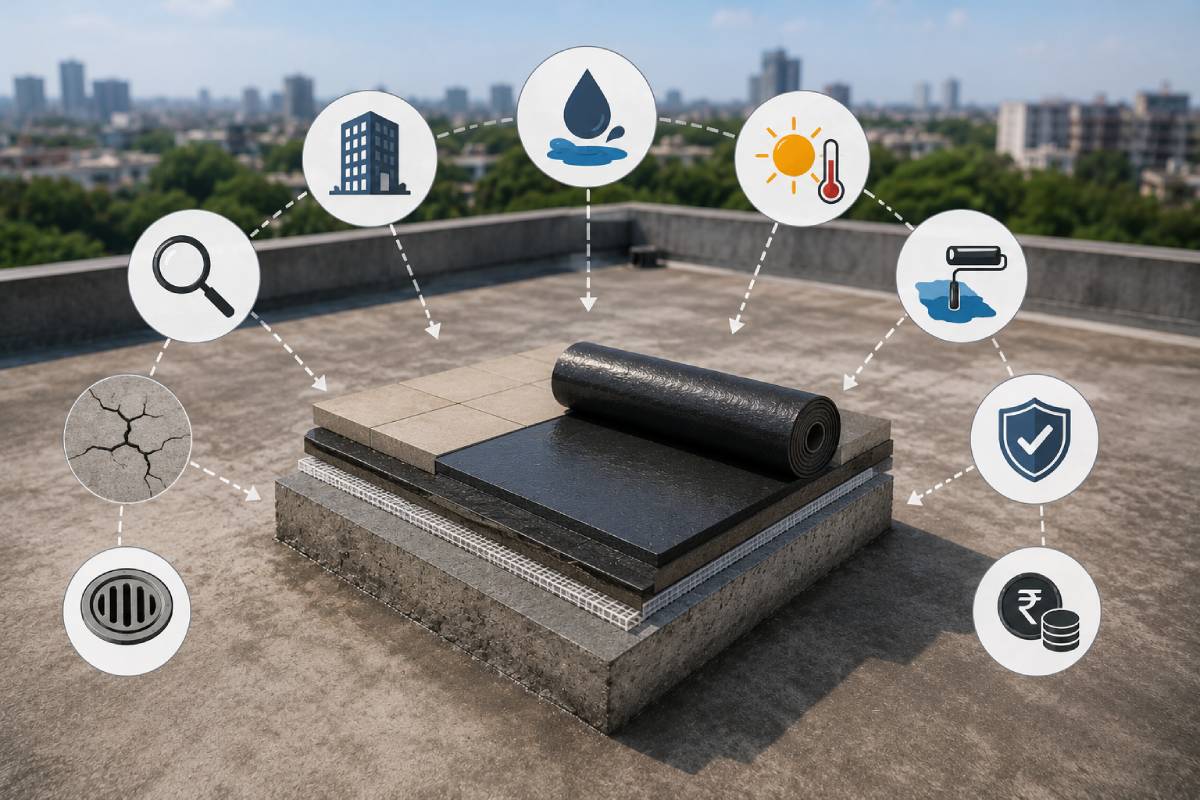
Terrace Inspection Before Waterproofing
A professional terrace waterproofing project should begin with inspection and diagnosis, not immediate chemical application.
The purpose of inspection is to determine:
- Where water may be entering
- Why water is entering
- Which parts of the existing system have failed
- Whether drainage is adequate
- What preparation is required
- Which waterproofing approach may be suitable
The brief specifically identifies surface condition, concrete cracks, existing membrane, terrace slope, drainage outlets, parapet junctions, expansion joints, pipe penetrations, ponding areas and previous repair locations as key inspection points.
What Should Terrace Waterproofing Contractors Inspect?
Overall Surface Condition
The first step is to understand the terrace as a whole.
The contractor should look for:
- Cracks
- Damaged surfaces
- Loose material
- Existing coatings
- Tile condition
- Ponding
- Previous repairs
This establishes the starting condition for the project.
Concrete Cracks
Cracks should be mapped rather than simply noticed and ignored.
The inspection should consider:
- Location
- Pattern
- Width
- Whether the crack appears active
- Whether surrounding material is damaged
The repair method should correspond to the type and significance of the crack.
Existing Waterproofing Membrane or Coating
If waterproofing has previously been carried out, its condition matters.
The contractor should determine whether the existing system is:
- Intact
- Partially damaged
- Peeling
- Cracked
- Poorly bonded
- Completely deteriorated
This helps determine whether localized repair, preparation and recoating, or a more comprehensive system is appropriate.
Terrace Slope
The terrace should be assessed for its ability to move water toward drainage points. A waterproofing layer cannot compensate indefinitely for poor drainage.
If the surface allows water to remain in low areas, the contractor may need to consider whether slope correction is part of the solution.
Drainage Outlets
Every relevant outlet should be checked.
The inspection should identify:
- Blockages
- Poor outlet positioning
- Damaged grating
- Sediment accumulation
- Water flow issues
A newly waterproofed terrace still needs effective drainage.
Parapet Junctions
The junction between the terrace floor and parapet wall deserves particular attention. Cracks or failed detailing in this transition area can allow water to penetrate.
A waterproofing solution should therefore address vulnerable junctions rather than treating only the central floor area.
Expansion and Movement Joints
Where movement joints exist, they need to be identified before waterproofing begins. These areas may require specialized detailing because they can move differently from adjacent surfaces.
Simply applying the same coating across every area without considering movement can lead to premature failure.
Pipe Penetrations
All service penetrations should be inspected.
The contractor should identify whether there are:
- Open gaps
- Cracked sealants
- Deteriorated collars
- Water accumulation around pipes
These details can become important leakage pathways.
Ponding Areas
Areas where water repeatedly collects should be marked.
The contractor should determine whether ponding is caused by:
- Poor slope
- Blocked drainage
- Surface deformation
- Incorrect outlet positioning
The solution should address the reason for ponding rather than simply covering the area with another coating.
Why Applying Waterproofing Chemicals Without Inspection Often Fails
This is one of the most important concepts in the entire article. A contractor may arrive at a leaking terrace and immediately recommend a particular chemical. That approach can be inadequate if the actual cause has not been established.
For example:
Leakage
→ Apply coating
→ Rainfall returns
→ Leakage returns
This happens when the treatment addresses the symptom rather than the cause.
A more reliable process is:
Leakage → Inspection → Cause Identification → Surface Preparation → Correct Repair → Waterproofing System → Testing → Protection
The chemical is therefore one part of the solution—not the entire solution.
Terrace Inspection: What Homeowners Should Ask the Contractor
Before approving the work, ask the contractor to explain:
1. Where is the leakage coming from?
A contractor should explain the suspected source rather than simply naming a product.
2. What condition is the existing waterproofing in?
If there is an old system, understand whether it is being retained, repaired or removed.
3. Is there a drainage problem?
Waterproofing and drainage should be considered together.
4. Are cracks present?
Ask how they will be treated.
5. Does the terrace need slope correction?
If water is ponding, this question is essential.
6. What happens at parapet junctions?
These vulnerable areas should not be ignored.
7. How will pipe penetrations be treated?
Ask for details rather than a generic statement.
8. How will the completed system be tested?
Testing should be discussed before work starts.
The Most Important Rule Before Choosing a Terrace Waterproofing Solution
Do not begin with: “Which waterproofing chemical should I buy?”
Begin with: “Why is this terrace leaking?”
Once the cause and surface condition are understood, the contractor can evaluate the appropriate waterproofing system and execution method.
The attached strategy intentionally places inspection before solution selection, because this helps the article answer both the homeowner's problem and the commercial decision behind hiring terrace waterproofing contractors in Thane.
Part 2 - Waterproofing Methods, Chemical Comparison, Execution Process & Tile Waterproofing
In Part 1, we established that terrace leakage should be approached as a diagnosis problem before it becomes a product-selection problem.
A visible crack, damp ceiling or ponding area does not automatically tell you which waterproofing system should be used. The terrace has to be inspected first, the existing surface assessed, drainage checked and vulnerable junctions identified.
Once the cause and condition are understood, the next question is: Which terrace waterproofing solution is appropriate for this particular terrace? There is no single waterproofing method that is ideal for every residential terrace.
Different systems have different characteristics, application requirements, movement tolerance, exposure conditions and preparation requirements. The attached brief specifically calls for comparison of cementitious, acrylic, PU, bituminous, APP and SBS systems, together with their advantages, limitations and appropriate applications.
Terrace Waterproofing Methods: Which System Is Right?
Before comparing systems, it is important to understand that waterproofing products are not interchangeable simply because they are all marketed as “waterproof.” A cementitious system behaves differently from a polyurethane coating.
A liquid-applied acrylic system is different from a bituminous membrane. APP and SBS modified membranes have different characteristics and installation requirements.
The correct choice depends on the terrace's existing condition, exposure, movement, drainage, accessibility, existing finish and the expected use of the surface.
Cementitious Waterproofing
Cementitious waterproofing systems generally use cement-based materials modified with suitable additives or polymers to create a water-resistant layer.
They can be useful in selected concrete and masonry applications and are commonly considered for areas where compatibility with mineral substrates is important.
Potential Advantages:
- Cement-based system
- Suitable for certain concrete/masonry surfaces
- Can be applied to appropriately prepared mineral substrates
- Useful in selected repair and waterproofing applications
Limitations:
The system still depends heavily on:
- Proper surface preparation
- Correct mixing
- Application thickness
- Crack treatment
- Curing
- Detailing at joints
A cementitious coating should not automatically be considered the best option simply because the terrace is concrete.
The contractor needs to assess whether the system can accommodate the movement and exposure conditions of the specific terrace.
Acrylic Waterproofing
Acrylic waterproofing systems are generally liquid-applied coatings that form a continuous protective layer after application. They can be useful where a coating-based approach is appropriate and the existing substrate can be adequately prepared.
Potential Advantages:
- Liquid application
- Can create a continuous coating
- Useful for certain exposed terrace applications
- Can be applied around appropriately detailed areas
Limitations:
Performance depends on:
- Substrate preparation
- Product specification
- Application thickness
- Weather conditions during application
- Detailing
- Maintenance
Acrylic systems should therefore be selected based on the manufacturer's technical requirements and the terrace condition rather than simply choosing the product with the lowest price.
Polyurethane Waterproofing
Polyurethane, commonly referred to as PU waterproofing, is a liquid-applied waterproofing approach that can create a continuous membrane after curing. One reason PU systems are considered for certain terraces is their ability to form a seamless layer when properly applied.
Potential Advantages:
- Seamless liquid-applied membrane
- Useful for appropriately prepared surfaces
- Can accommodate certain surface movement depending on the system
- Can be detailed around complex areas
Limitations:
The substrate must be suitably prepared. Moisture conditions, application thickness, primer requirements, detailing and curing requirements can significantly influence performance.
Therefore, PU should not be treated as a universal “premium chemical” that automatically solves terrace leakage. The complete system and application process matter.
Bituminous Waterproofing
Bituminous waterproofing uses bitumen-based materials to provide a water-resistant barrier. Depending on the system, it can involve coatings or membrane-based applications.
Bituminous systems have been used extensively in building waterproofing applications and can be appropriate for certain terrace conditions.
Potential Advantages:
- Established waterproofing technology
- Suitable for selected exposed or protected applications
- Can provide a continuous barrier
- Membrane systems can offer defined thickness
Limitations:
The installation method and surface preparation are critical. Where torch-applied membranes are used, appropriate safety procedures and trained installation are essential.
The finished system may also require protection depending on whether the terrace will remain exposed or receive another surface over it.
APP Modified Bitumen Membrane
APP, or atactic polypropylene, modified bituminous membranes are manufactured by modifying bitumen to improve certain performance characteristics.
They are commonly supplied as sheet membranes and may be installed using appropriate heating/torch techniques depending on the specified product.
Potential Advantages:
- Factory-manufactured membrane thickness
- Suitable for certain roof and terrace applications
- Good resistance to outdoor exposure when correctly specified
- Established membrane technology
Limitations:
The quality of installation is critical.
Particular attention is required at:
- Overlaps
- Edges
- Corners
- Pipe penetrations
- Parapet junctions
- Drains
A technically good membrane can still fail if joints and detailing are poorly executed.
SBS Modified Bitumen Membrane
SBS, or styrene-butadiene-styrene, modified bituminous membranes are another modified bitumen membrane technology.
The modification can provide different flexibility and performance characteristics compared with conventional bitumen, particularly where movement and temperature variation are considerations.
Potential Advantages:
- Flexible membrane technology
- Suitable for selected roofing applications
- Can accommodate movement depending on system specification
- Consistent manufactured membrane thickness
Limitations:
As with other membrane systems, performance depends heavily on:
- Surface preparation
- Primer
- Bonding
- Overlap detailing
- Flashing
- Drainage
- Installation quality
The membrane should therefore be selected and installed as a complete system rather than as an isolated material.
Terrace Waterproofing Methods Comparison
A homeowner does not necessarily need to know every technical detail of each terrace waterproofing solutions product. But understanding the broad differences helps when discussing the project with contractors.
| Waterproofing System | General Form | Key Consideration | Typical Application Consideration |
|---|---|---|---|
| Cementitious | Cement-based coating | Substrate compatibility & preparation | Selected concrete/masonry applications |
| Acrylic | Liquid coating | Surface preparation & coating system | Suitable exposed-surface applications |
| PU | Liquid membrane | Moisture, detailing & application | Selected terraces requiring seamless membrane |
| Bituminous | Coating/membrane | Installation & protection | Selected roof/terrace systems |
| APP | Modified bitumen membrane | Joint/overlap detailing | Roof and terrace membrane applications |
| SBS | Modified bitumen membrane | Flexibility & installation | Selected roof/terrace applications |
The table is a selection framework, not a recommendation that one system is universally better than another.
The actual terrace waterproofing solutions should be selected after inspection; professional roof waterproofing services should follow the product's technical specifications.
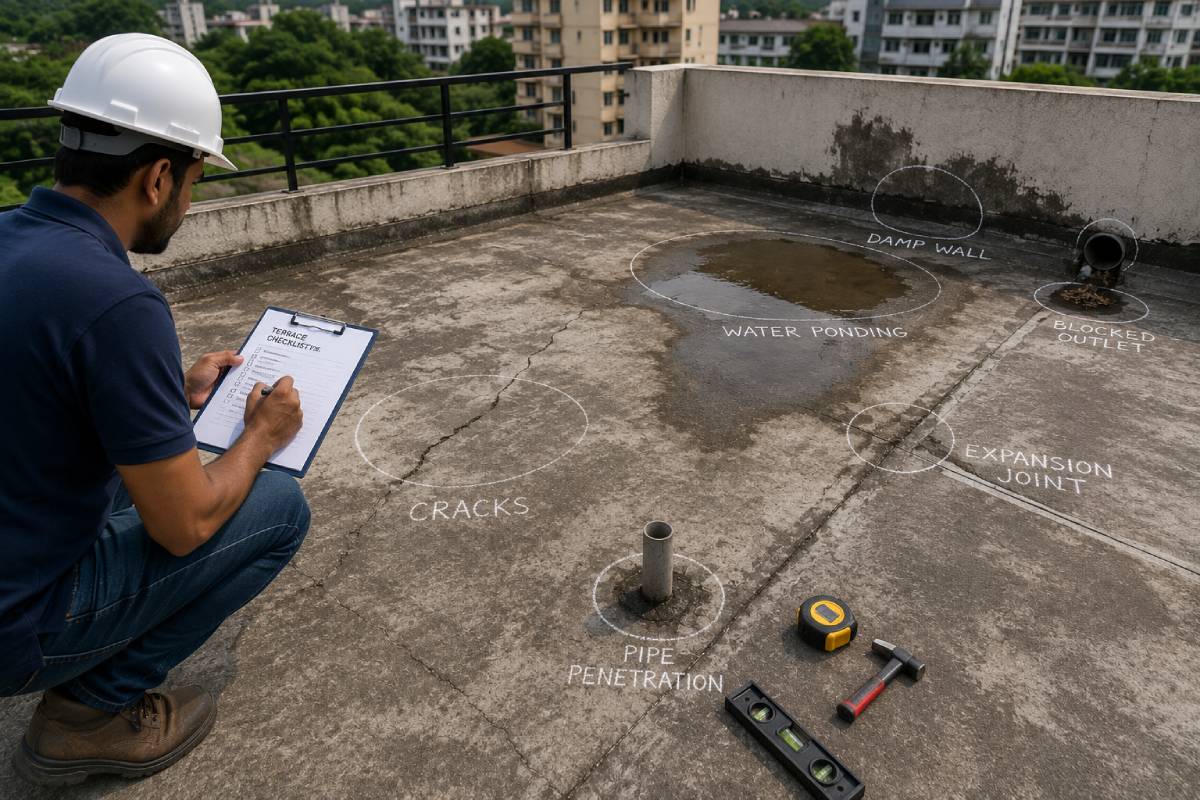
What Should Determine the Waterproofing Method?
The contractor should consider several factors before recommending a system.
Existing Surface
Is the terrace:
- Bare concrete?
- Screeded?
- Tiled?
- Previously coated?
- Covered by an old membrane?
The preparation requirements differ considerably.
Leakage Severity
Is the problem:
- A single localized leak?
- Several leakage points?
- Widespread dampness?
- Persistent ponding?
- Repeated monsoon leakage?
A small isolated defect may require a different intervention, and the right terrace leakage solution depends on whether the existing system has broadly failed.
Surface Movement
Terraces experience thermal movement. If movement is significant, the flexibility and crack-bridging characteristics of the selected system become important.
Drainage
Even the best waterproofing system cannot compensate indefinitely for poor drainage.
If water repeatedly collects in low areas, the drainage or slope should be addressed as part of the project.
Existing Waterproofing
If an old membrane or coating exists, its adhesion and condition should be checked. The new system needs to be compatible with the prepared substrate or the old system may need to be removed.
Complete Terrace Waterproofing Process
Professional terrace waterproofing services should follow a controlled sequence.
The exact process depends on the system, but a typical workflow can be:
Inspection
↓
Surface Preparation
↓
Cleaning
↓
Crack & Joint Treatment
↓
Drainage Correction
↓
Primer / Base Treatment
↓
Waterproofing Application
↓
Detailing
↓
Curing
↓
Testing
↓
Protective Layer
↓
Final Inspection
The attached brief specifically recommends presenting this step-by-step workflow and covering inspection, surface preparation, crack repair, primer, waterproofing layers, curing, testing, protective layer and final inspection.
Step 1 - Surface Inspection and Preparation
The first physical step is preparing the terrace.
The surface may contain:
- Dust
- Loose concrete
- Old coating
- Algae
- Dirt
- Cement residue
- Broken tiles
- Weak plaster
- Debris
These contaminants can affect adhesion.
Therefore, the surface must be prepared according to the requirements of the selected waterproofing system.
Step 2 - Cleaning
Cleaning may involve mechanical or manual methods depending on the surface. The objective is to create a sound substrate.
The contractor should not simply clean the obvious areas where leakage is visible. The entire waterproofing zone should be inspected and prepared as required by the chosen system.
Step 3 - Crack Treatment
Cracks should be treated before the main waterproofing layer is applied.
The appropriate repair depends on:
- Crack width
- Crack depth
- Location
- Movement
- Surrounding material
A contractor should explain the repair method rather than simply saying: “We will fill all the cracks.” Different cracks can require different treatment.
Step 4 - Joint Treatment
Joints and transitions need particular attention.
Important locations include:
- Floor-to-parapet junction
- Expansion joints
- Construction joints
- Pipe penetrations
- Drain areas
These are often more vulnerable than the middle of a flat terrace surface. A waterproofing system should therefore include appropriate detailing at these locations.
Step 5 - Drainage Correction
Before waterproofing is completed, the terrace drainage should be checked.
The contractor should confirm:
- Outlets are clear
- Water can reach the outlets
- Low points are understood
- Ponding areas are addressed
- Drain details are properly treated
If the terrace has a significant slope problem, simply applying waterproofing material may not solve the underlying issue.
Step 6 - Primer or Base Treatment
Some waterproofing systems require a primer before the main membrane or coating. The purpose can include improving adhesion or preparing the substrate for the waterproofing layer.
The primer should be selected according to the waterproofing system and substrate. It should not be treated as an optional product that can be replaced with any generic coating.
Step 7 - Waterproofing Application
The actual waterproofing system is applied after preparation.
Depending on the selected method, this can involve:
- Liquid coating
- Multiple coats
- Reinforced membrane
- Sheet membrane
- Cementitious treatment
The application must follow the product's technical requirements. Thickness, coverage, overlaps and curing can all affect performance.
Step 8 - Detailing of Vulnerable Areas
This is one of the most important stages.
Special attention should be given to:
Corners
Horizontal and vertical surfaces meet here.
Parapets
The terrace-to-wall transition can be vulnerable.
Drains
Water needs to move through the system without creating a leakage path.
Pipe Penetrations
Gaps around services need proper treatment.
Joints
Movement areas require suitable detailing.
A terrace may have a perfectly coated central surface and still leak because one vulnerable junction was poorly treated.
Step 9 - Curing and Drying
The waterproofing system needs appropriate curing or drying time according to its specifications. This is particularly important when multiple layers are being applied. Rushing the next construction activity can interfere with the performance of the system.
The contractor should therefore explain:
- How long each stage requires
- When the next coat can be applied
- When testing can occur
- When the protective layer can be installed
Step 10 - Waterproofing Testing
Testing is an important part of quality control. Depending on the system and project, appropriate testing may be used to identify whether the completed waterproofing system is functioning as intended.
For terraces and wet areas, water-related testing may be appropriate where technically suitable. Testing should happen before the waterproofed surface is concealed by subsequent construction wherever applicable.
Step 11 - Protective Layer
Some waterproofing systems require protection after installation.
This can be particularly important where the waterproofing layer could otherwise be damaged by:
- Foot traffic
- Tiles
- Construction activity
- Sharp materials
- Furniture/equipment
The protection system depends on the waterproofing method and final terrace use.
Step 12 - Final Inspection
Before the project is considered complete, the contractor should inspect:
- Surface condition
- Drains
- Joints
- Parapets
- Pipe penetrations
- Visible defects
- Protection layer
The homeowner should also understand what maintenance is expected after completion.
Waterproofing vs Terrace Tile Replacement
This is one of the most important decisions for homeowners. Many terrace problems are incorrectly approached as a tile-replacement problem. But tiles and waterproofing perform different functions.
Tiles
Primarily provide a finished surface.
Waterproofing
Provides the water-resistance system beneath or within the terrace construction.
Therefore: Replacing tiles does not automatically mean the terrace has been waterproofed.
When Tile Replacement May Be Necessary
Tile replacement may make sense when:
- Tiles are extensively damaged
- Tiles are loose across a large area
- Surface levels need correction
- The existing finish must be removed to access the waterproofing layer
- The selected waterproofing system requires substrate exposure
But the decision should be based on the condition of the complete terrace system.
Can You Waterproof a Terrace Without Removing Tiles?
Sometimes, yes-but not universally.
The feasibility depends on:
- Tile condition
- Tile adhesion
- Existing leakage
- Grout condition
- Drainage
- Surface slope
- Existing waterproofing
- Selected waterproofing system
If tiles are firmly bonded and the surface is suitable for a compatible waterproofing system, certain approaches may be possible without complete tile removal. However, if the underlying system has failed extensively or tiles are loose and damaged, retaining them may not be the appropriate solution.
When Waterproofing Over Tiles Can Be Risky
Waterproofing over existing tiles can become problematic when:
- Tiles are loose
- Water is trapped underneath
- Grout is badly deteriorated
- Drainage is poor
- The existing surface is unstable
- The new waterproofing system is not compatible
- The old waterproofing has failed extensively
In these circumstances, applying a new coating over the existing finish may only conceal the problem.
A Practical Decision Framework
| Terrace Condition | Possible Approach |
|---|---|
| Minor localized leakage | Targeted repair after inspection |
| Good tiles + isolated defects | Compatible localized/system treatment |
| Good tiles + suitable substrate | Possible waterproofing over tiles, depending on system |
| Loose tiles | Investigate removal |
| Severe ponding | Address drainage/slope |
| Failed old waterproofing | Repair or replacement based on inspection |
| Widespread leakage | Consider complete system assessment |
| Damaged substrate | Repair substrate before waterproofing |
This should be treated as a decision framework, not a substitute for site inspection.
Why “One Chemical for Every Terrace” Is the Wrong Approach
Homeowners sometimes hear statements such as: “This chemical works for every terrace.” That should be treated cautiously.
Terraces differ in:
- Construction
- Age
- Surface
- Movement
- Drainage
- Previous repairs
- Existing waterproofing
- Leakage severity
Therefore, the waterproofing system should be selected based on the actual site.
A professional terrace waterproofing contractor should be able to explain why a particular system is being recommended.
What a Professional Waterproofing Proposal Should Explain
Before approving a quotation, ask for a clear explanation of:
Existing Condition
What did the inspection find?
Problem
What is causing the leakage?
Preparation
What preparation is required?
Waterproofing System
Which system is being proposed?
Application
How many layers/coats or what membrane system?
Detailing
How will cracks, drains, joints and parapets be treated?
Testing
How will the finished system be tested?
Protection
What protects the waterproofing afterward?
Warranty
What is covered and what is excluded?
This information is much more valuable than simply knowing the brand name of the chemical.
What Homeowners Should Know About Waterproofing Chemicals
Searching for terrace waterproofing chemicals can produce hundreds of products.
But choosing a product based purely on:
- Brand
- Price
- “Premium” label
- Number of coats
can be misleading. The correct product needs to be compatible with the selected waterproofing system, substrate and site conditions. The installation method can be equally important. A technically suitable product installed incorrectly can still fail.
What Actually Makes Waterproofing Last?
Long-term performance depends on several interconnected factors:
- Correct Diagnosis
- Suitable System
- Good Surface Preparation
- Correct Detailing
- Proper Application
- Adequate Curing
- Testing
- Protection
- Drainage Maintenance
This is why waterproofing should be considered a system of work, not simply a chemical purchase.
The Real Difference Between a Waterproofing Product and a Waterproofing Solution
A product is something you buy. A solution is a complete process.
For example:
Product
“PU waterproofing chemical.”
Solution
“Inspect terrace → identify cracks → repair substrate → prepare surface → prime → apply specified PU system → detail drains/parapets → cure → test → protect.”
The second approach provides the homeowner with a much clearer understanding of what is actually being purchased.
This distinction is particularly important when comparing waterproofing contractors near me.
How to Compare Two Waterproofing Contractors
Suppose:
Contractor A
“Terrace waterproofing - ₹X per sq. ft. Premium chemical. Five-year warranty.”
Contractor B
“Inspection → surface preparation → crack treatment → drain detailing → specified waterproofing system → curing → testing → protection → documented warranty.”
Even if Contractor B quotes a higher amount, the second proposal provides much more information for evaluating the actual scope.
The correct comparison is: System + Preparation + Workmanship + Testing + Protection + Warranty, not merely: Price per sq. ft.
Part 2 Key Takeaway
The right terrace waterproofing solution is determined by the terrace-not by the popularity of a chemical.
A professional approach follows:
Inspect
↓
Identify the cause
↓
Assess existing surface
↓
Choose the appropriate system
↓
Prepare the substrate
↓
Treat cracks, joints and vulnerable areas
↓
Apply waterproofing
↓
Cure
↓
Test
↓
Protect
This process is what separates a properly planned waterproofing project from simply applying a coating over a leaking surface. The attached brief also emphasizes that the next stages of the article should address terrace waterproofing cost, repair versus complete re-waterproofing, contractor selection, warranty, maintenance and commercial decision-making, which will be covered next.
Part 3 - Terrace Waterproofing Cost, Repair vs Re-Waterproofing, Contractor Selection & Quality Control
In Part 1, we covered why terraces leak, the signs of waterproofing failure and how a professional inspection should be carried out.
In Part 2, we examined the major terrace waterproofing methods, including cementitious, acrylic, PU, bituminous, APP and SBS systems, along with the correct execution sequence and the important question of whether waterproofing can be done without removing existing terrace tiles.
The next decision homeowners usually face is much more commercial: How much will terrace waterproofing cost, and how do I know whether a contractor's quotation is actually reasonable?
This is where many waterproofing projects become difficult to compare. A contractor may quote a low rate per square foot but exclude surface preparation, crack repair, drainage correction, protective layers or tile removal. Another contractor may quote more but include a complete waterproofing system with preparation, detailing, testing and protection.
Therefore, the objective should not be to find the cheapest waterproofing rate. It should be to determine the complete scope required to solve the leakage problem.
Terrace Waterproofing Cost in Thane - What Actually Determines the Price?
There is no single fixed terrace waterproofing cost in Thane that applies to every property. The cost depends on the condition of the terrace and the system required.
The attached content strategy specifically identifies terrace area, existing waterproofing, tile removal, crack repair, surface preparation, slope correction, waterproofing system, accessibility, protective layers and labour as important cost variables.
A useful way to think about the estimate is:
Terrace Area + Surface Preparation + Repair Work + Waterproofing System + Drainage/Slope Work + Labour + Protection + Testing = Total Waterproofing Project Cost
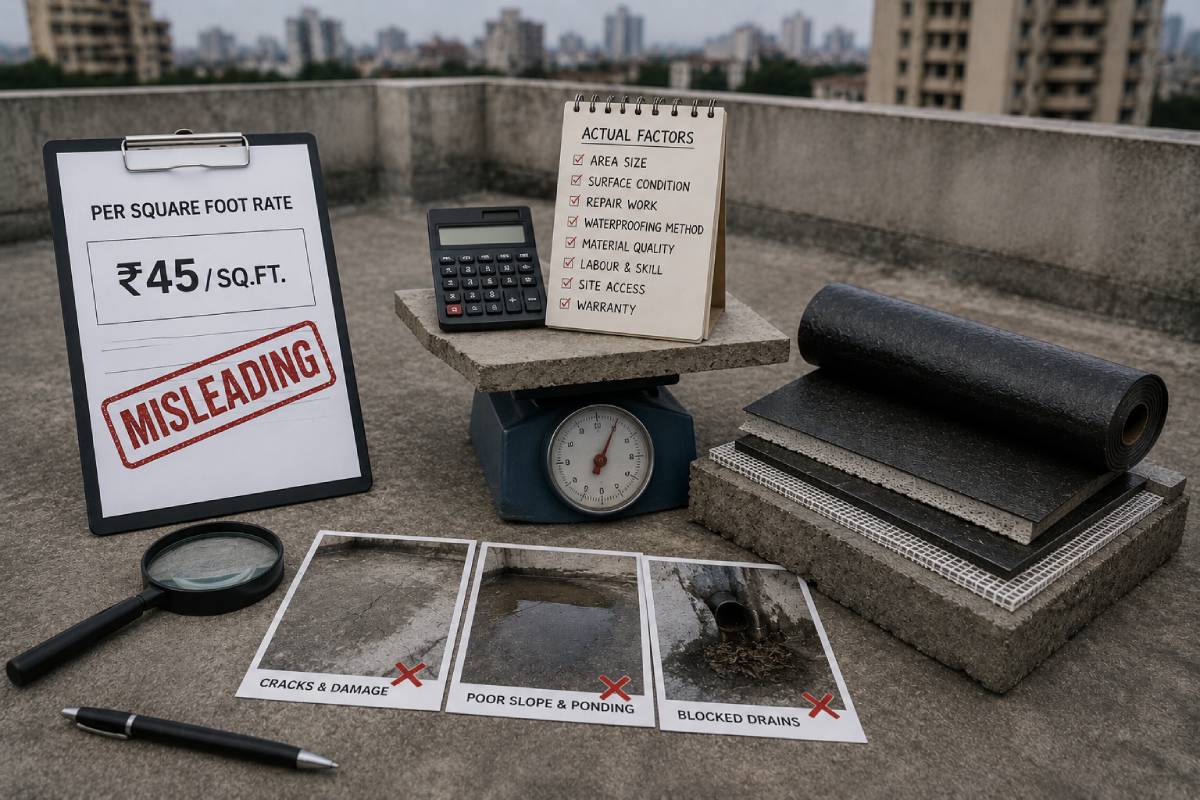
Why Per-Square-Foot Waterproofing Rates Can Be Misleading
Suppose two contractors give you:
Contractor A: ₹X per sq. ft.
Contractor B: ₹Y per sq. ft.
The natural reaction is to choose the lower rate. But ask what each rate contains.
Does it include:
- Cleaning?
- Existing coating removal?
- Crack repair?
- Primer?
- Waterproofing coats?
- Reinforcement?
- Drain treatment?
- Parapet treatment?
- Pipe-penetration treatment?
- Testing?
- Protective layer?
- Debris removal?
If these items are different, the two rates are not actually comparable.
Major Components of Terrace Waterproofing Cost
A detailed quotation may contain several separate cost components.
Surface Preparation
This can involve:
- Cleaning
- Removing loose material
- Removing failed coatings
- Repairing damaged surfaces
- Preparing the substrate
A badly deteriorated terrace generally requires more preparation than a sound terrace.
Crack Repair
The cost depends on:
- Number of cracks
- Crack width
- Crack depth
- Repair method
- Area affected
Minor localized cracks may require limited treatment. Widespread cracking can require more extensive preparation.
Existing Tile Removal
If the terrace is tiled and the tiles need to be removed, demolition and debris disposal become additional cost components. This may also expose the underlying screed or concrete, which could reveal additional repairs.
Therefore, tile removal can sometimes change the final scope after the terrace is opened.
Slope Correction
If water is consistently ponding because of poor slope, additional civil work may be required.
This can involve:
- Removing damaged surface material
- Creating appropriate levels
- Installing screed
- Correcting drainage paths
Waterproofing and slope correction should therefore be evaluated together where ponding is significant.
Waterproofing Material
The material/system cost depends on the selected system.
Potential systems include:
- Cementitious
- Acrylic
- PU
- Bituminous
- APP membrane
- SBS membrane
The correct choice should be based on site conditions rather than selecting the cheapest material.
Labour and Application
Waterproofing is highly dependent on workmanship.
The labour component can include:
- Surface preparation
- Crack treatment
- Primer
- Membrane/coating application
- Detailing
- Curing
- Testing
- Protection
Therefore, a very low labour rate can be misleading if it results in rushed preparation or inadequate application.
Drain and Pipe Detailing
Drain outlets and pipe penetrations require careful treatment. These areas can represent a relatively small percentage of the terrace area but have a disproportionate impact on waterproofing performance. A quotation should therefore clearly state whether such detailing is included.
Indicative Terrace Waterproofing Cost Framework
For terrace waterproofing in Thane, homeowners should evaluate the project using a scope-based framework rather than publishing one universal rate.
| Cost Component | Low Complexity | Medium Complexity | High Complexity |
|---|---|---|---|
| Surface preparation | Limited | Moderate | Extensive |
| Crack repair | Localized | Multiple areas | Widespread |
| Existing coating | Good condition | Partial failure | Major failure |
| Tiles | Retained | Partial removal | Complete removal |
| Drainage | Functional | Minor correction | Major correction |
| Waterproofing | Single-system application | Multi-stage treatment | Extensive system |
| Protection | Basic | Required | Full protective layer |
| Labour | Standard | More supervision | High coordination |
| Overall cost | Lower | Moderate | Higher |
This is a more reliable planning model than assuming that every terrace has the same per-square-foot cost.
Small Terrace vs Large Terrace - Does Larger Always Mean More Expensive Per Sq. Ft.?
Not necessarily. Larger terraces can sometimes benefit from economies of scale because preparation, equipment and mobilization costs are distributed over a larger area.
However, larger terraces may also contain:
- More drains
- More joints
- More penetrations
- More parapet length
- More damaged areas
Therefore, area alone does not determine cost.
A small terrace with severe leakage and extensive repairs can require more work per square foot than a large terrace in relatively good condition.
Does Terrace Waterproofing Cost More If Tiles Need to Be Removed?
Usually, yes, because tile removal introduces additional activities.
The project may now require:
Tile Removal
→ Debris Removal
→ Surface Inspection
→ Substrate Repair
→ Level Correction
→ Waterproofing
→ Protection
→ New Finish
However, removing tiles is not automatically necessary. The decision should depend on the condition of the existing tiles and the waterproofing system underneath.
Repair vs Complete Re-Waterproofing - Which Should You Choose?
This is one of the most important decisions in terrace leakage repair.
A homeowner may have two options:
Option A - Localized Repair
Treat the specific defective areas.
Option B - Complete Re-Waterproofing
Remove/prepare the existing system as required and install a new waterproofing system across the affected terrace.
The correct decision depends on the extent and nature of the failure.
When Localized Repair May Make Sense
A localized repair may be reasonable when:
- Leakage is isolated
- Existing waterproofing remains generally sound
- The source is clearly identifiable
- Cracks are limited
- Drainage is functioning
- The existing system is otherwise intact
For example, if one specific pipe penetration has failed while the rest of the terrace system remains in good condition, replacing the entire terrace system may not be necessary.
When Complete Re-Waterproofing May Be More Appropriate
A broader intervention may be worth considering when:
- Leakage occurs across multiple areas
- The old waterproofing has broadly deteriorated
- Coating is peeling extensively
- There are widespread cracks
- Ponding is persistent
- Previous repairs repeatedly failed
- The existing system has reached the end of its useful service life
In such cases, repeatedly patching individual points may simply postpone the larger problem.
Repair vs Redo Decision Matrix
| Condition | Local Repair | Complete Re-Waterproofing |
|---|---|---|
| One isolated leak | ✅ Possible | Usually unnecessary |
| One damaged pipe penetration | ✅ Possible | Usually unnecessary |
| Several independent leaks | ⚠ Assess | ✅ Consider |
| Widespread cracks | ⚠ Limited benefit | ✅ Often more appropriate |
| Old coating peeling extensively | ❌ Weak option | ✅ Consider |
| Severe ponding | ❌ Does not solve cause | ✅ With slope correction |
| Repeated annual repairs | ⚠ Questionable | ✅ Assess complete system |
| Sound existing system | ✅ Prefer targeted repair | Not always needed |
This is a decision framework, not a substitute for a physical inspection.
Why Repeated Patch Repairs Can Become Expensive
Imagine a homeowner spends ₹X every year repairing one leakage point. The following year, another point may need terrace leakage repair. Then another. After several monsoons, the homeowner may have spent substantial money without replacing the underlying failed system.
The problem is not necessarily that the repairs were technically wrong. The problem may be that the scope of the failure was larger than the scope of the repair. A professional inspection should therefore determine whether the project needs a repair or a broader system-level intervention.
Terrace Leakage Repair - Do Not Repair the Ceiling First
When a ceiling below the terrace develops a damp patch, homeowners sometimes immediately:
- Scrape the paint
- Apply putty
- Repaint
- Repair plaster
These terrace leakage repair steps may improve the appearance. But they do not necessarily solve the leakage.
The correct terrace leakage solution sequence is:
Find Water Source
↓
Fix Terrace Problem
↓
Allow Area to Dry
↓
Repair Damaged Ceiling
↓
Repaint
This prevents the interior repair from becoming a recurring expense.
Before → Failure → Inspection → Repair → After
For strong project documentation, terrace waterproofing should ideally be demonstrated using a real project.
A useful case-study structure is:
Before
Show:
- Cracks
- Ponding
- Failed coating
- Damp ceiling below
- Damaged joints
Inspection
Explain:
- What was observed
- Where leakage was suspected
- What the existing system looked like
- What drainage issues were found
Failure
Explain the actual reason identified.
For example:
- Failed old waterproofing
- Poor slope
- Open joint
- Damaged pipe penetration
Repair
Show:
- Surface preparation
- Crack treatment
- Waterproofing application
- Drain treatment
- Protective layer
After
Show:
- Completed surface
- Improved drainage
- Finished waterproofing
- Repaired interior damage
The attached brief specifically recommends this Before → Inspection → Failure → Repair → After format as an important EEAT differentiator.
Important: this section should use genuine Eagle Ventures project evidence if available. It should not be presented as a real case study using invented measurements, costs or outcomes.
How to Choose Terrace Waterproofing Contractors in Thane
Choosing the right terrace waterproofing contractors in Thane is more important than choosing a product based on its advertisement.
A contractor should demonstrate an understanding of:
- Leakage diagnosis
- Surface preparation
- Waterproofing systems
- Crack treatment
- Drainage
- Parapet detailing
- Pipe penetrations
- Testing
- Protection
- Warranty
For terrace waterproofing contractors in Thane, the contractor should also be able to explain why a particular system is being recommended for the property.
Should You Search for “Waterproofing Contractors Near Me”?
Searches such as:
- waterproofing contractors near me
- waterproofing services near me
- waterproofing near me
usually indicate strong commercial intent.
The homeowner is not simply learning what waterproofing means. They are often trying to find someone who can inspect and solve an active problem. However, proximity alone should not determine the selection. A contractor located nearby but unable to explain the waterproofing system may be a weaker choice than an experienced contractor with a structured inspection and execution process.
12 Questions to Ask Waterproofing Contractors Before Hiring
Before approving a waterproofing project, ask these questions:
1. What is causing the leakage?
The contractor should explain the suspected cause.
2. Did you inspect the entire terrace?
A quotation based only on photographs may not identify hidden conditions.
3. What is the condition of the existing waterproofing?
Ask whether it can be retained or needs replacement.
4. What waterproofing system are you recommending?
Ask for the actual system, not merely a generic product name.
5. Why is this system suitable?
A good contractor should explain the reasoning.
6. How will cracks be treated?
Crack repair should be included in the method.
7. What will happen to the drains?
Drainage is part of the waterproofing solution.
8. How will parapet junctions be treated?
Ask for specific detailing.
9. Do tiles need to be removed?
If yes, understand why.
10. How will the work be tested?
Testing should be part of the project plan.
11. What protection will be provided?
Waterproofing can be damaged by subsequent work if left unprotected.
12. What does the warranty cover?
This question is particularly important.
How to Compare Waterproofing Quotations
Do not compare: ₹X/sq. ft. vs ₹Y/sq. ft.
Compare:
Scope
What work is included?
Preparation
How is the substrate prepared?
System
What waterproofing system is being used?
Detailing
Are cracks, drains, parapets and penetrations included?
Testing
Is testing included?
Protection
Is the finished waterproofing protected?
Warranty
What exactly is covered?
This produces a much more meaningful comparison.
Waterproofing Warranty - What Should You Check?
A warranty should not simply say: “5-year waterproofing warranty.”
The homeowner should understand what that statement actually means.
Ask:
- What work is covered?
- Does it cover leakage only?
- Does it cover material failure?
- Does it cover workmanship?
- Are structural cracks excluded?
- Is damage from subsequent construction excluded?
- Are drainage problems excluded?
- What maintenance is required?
- How is a warranty claim initiated?
The attached strategy specifically identifies warranty coverage and exclusions as an important part of the article's commercial decision-making section.
What Can Void or Limit a Waterproofing Warranty?
The exact terms depend on the contractor and waterproofing system, but homeowners should ask whether the warranty is affected by:
- Subsequent drilling
- New construction over the waterproofing
- Damage from other contractors
- Structural movement
- Blocked drains
- Unauthorized modifications
- Poor maintenance
- External sources unrelated to the waterproofing system
A warranty is useful only when its conditions are clearly understood.
How Long Does Terrace Waterproofing Last?
There is no universal lifespan that applies to every terrace waterproofing system.
Longevity depends on:
- System selected
- Product quality
- Surface preparation
- Installation quality
- Exposure
- Thermal movement
- Drainage
- Maintenance
- Subsequent damage
A properly installed system can perform for years, but no contractor should treat a waterproofing warranty as proof that leakage can never occur. The system still needs appropriate maintenance and protection.
Terrace Waterproofing Maintenance After Completion
Terrace waterproofing services do not eliminate the need for terrace maintenance.
Homeowners should periodically inspect:
- Drain outlets
- Leaves/debris
- Ponding
- Visible cracks
- Damaged coating
- Pipe penetrations
- Parapet junctions
Drainage maintenance is particularly important before and during the monsoon. A blocked drain can create a water-management problem even on a properly waterproofed terrace.
Pre-Monsoon Terrace Waterproofing Checklist
The attached brief recommends a practical checklist covering cracks, drainage, waterproofing condition, joints, parapets, pipe penetrations, ponding and interior leakage signs.
Use the following as a homeowner inspection list:
Terrace Surface
- Visible cracks checked
- Loose material identified
- Old waterproofing inspected
- Peeling coating checked
Drainage
- All outlets cleaned
- Water flow checked
- Ponding areas identified
Junctions
- Parapet junction inspected
- Pipe penetrations checked
- Expansion/construction joints inspected
Interior
- Ceiling stains checked
- Damp patches checked
- Peeling paint checked
- Damp smell investigated
Contractor
- Site inspection completed
- Cause explained
- System specified
- Quotation itemized
- Warranty explained
Common Terrace Waterproofing Mistakes
Even good materials can fail when the project is poorly executed. Read our guide on Common Terrace Waterproofing Mistakes to avoid these critical pitfalls:
Mistake 1 - Applying Chemical Directly Over a Dirty Surface
Poor adhesion can compromise the system.
Mistake 2 - Ignoring Cracks
Cracks need appropriate treatment before the main waterproofing layer.
Mistake 3 - Ignoring Drainage
Waterproofing does not replace proper drainage.
Mistake 4 - Treating Only the Visible Leak
The visible stain may not identify the actual water-entry point, so a proper terrace leakage solution should begin with diagnosis.
Mistake 5 - Ignoring Parapet Junctions
The terrace floor is only part of the waterproofing system.
Mistake 6 - Skipping Testing
A completed waterproofing system should be evaluated before being concealed or put back into service where applicable.
Mistake 7 - Allowing Other Contractors to Damage the New System
Drilling, cutting or heavy work after waterproofing can compromise the membrane or coating.
Mistake 8 - Choosing Solely on Price
A low quotation may exclude important preparation or protection work.
The Cost of Poor Waterproofing Is Usually Higher Than the Waterproofing Cost
This is an important value consideration. Suppose a terrace is waterproofed poorly.
The homeowner may subsequently pay for:
- Ceiling repair
- Plaster repair
- Painting
- Furniture protection
- Electrical investigation
- Repeated waterproofing
- Contractor visits
- Interior disruption
The direct waterproofing cost may therefore be only one part of the financial impact. Properly planned terrace waterproofing services can help reduce the likelihood of these repeated costs.
Waterproofing Decision Matrix for Homeowners
| Situation | Priority |
|---|---|
| One isolated leakage | Inspect source first |
| Repeated leakage every monsoon | Full terrace assessment |
| Water ponding | Drainage/slope assessment |
| Peeling old coating | Existing-system assessment |
| Loose terrace tiles | Substrate and tile inspection |
| Damp ceiling | Identify water source |
| Cracks + leakage | Crack and system assessment |
| Blocked drain | Clear and inspect drainage |
| Old failed waterproofing | Evaluate re-waterproofing |
| New terrace before monsoon | Preventive inspection |
This kind of decision framework is useful because it answers a question homeowners frequently ask: “Do I actually need complete waterproofing, or do I just need a repair?”
When Should You Call a Waterproofing Contractor?
Do not wait until water starts dripping heavily from the ceiling.
Contact a professional contractor when you notice:
- Repeated dampness
- Ceiling stains
- Cracks
- Ponding
- Peeling waterproofing
- Loose terrace tiles
- Repeated monsoon leakage
- Parapet seepage
- Damp smell
- Failed previous repairs
Early inspection can help establish whether the problem is localized or systemic.
What Makes a Professional Terrace Waterproofing Contractor Different?
A professional contractor should not simply arrive with a chemical drum.
They should be able to explain:
- What is failing?
- Why is it failing?
- What preparation is required?
- Which system is being proposed?
- How will vulnerable details be treated?
- How will it be tested?
- How will it be protected?
- What happens after handover?
This process-oriented approach is much more valuable than a product-only sales pitch.
Final Terrace Waterproofing Execution Framework
The complete project can now be summarized as:
Problem
Leakage, dampness, ponding or visible deterioration.
↓
Inspection
Terrace, drains, cracks, joints, parapets and penetrations.
↓
Diagnosis
Identify the likely source and failure mechanism.
↓
Scope
Repair, re-waterproofing, slope correction or combination.
↓
Preparation
Cleaning, removal, crack treatment and substrate correction.
↓
Waterproofing
Apply the appropriate system.
↓
Detailing
Treat drains, joints, parapets and pipe penetrations.
↓
Curing
Allow the system to develop its required properties.
↓
Testing
Check the completed system.
↓
Protection
Prevent damage from subsequent activity.
↓
Handover
Provide documentation and warranty terms.
↓
Maintenance
Keep drainage and vulnerable areas under observation.
This is the complete terrace waterproofing solution rather than simply a chemical application.
Part 3 Key Takeaway
The correct terrace waterproofing decision is not: “Which contractor gives the lowest price?” It is: “Which contractor has correctly identified the problem and provided a complete solution at a transparent cost?”
A reliable comparison should consider:
- Inspection
- Diagnosis
- Surface Preparation
- Repair
- Waterproofing System
- Detailing
- Testing
- Protection
- Warranty
Only then does the quoted terrace waterproofing cost become meaningful.
The attached content plan also recommends connecting this commercial section to the broader waterproofing service and related civil/interior pages, while using real project evidence wherever available to strengthen trust and first-hand experience.
Part 4 - Contractor Hiring Guide, Failure Case Study, Warranty, Maintenance & FAQs
A terrace waterproofing project should not end with the application of the waterproofing system. The final stage is equally important because homeowners need to know whether the work was properly completed, what was tested, what protection was provided, what the warranty actually covers and how the terrace should be maintained afterward.
The biggest lesson from the previous sections is simple: terrace leakage should be solved as a system problem, not treated as a cosmetic defect. Inspection, diagnosis, surface preparation, crack treatment, waterproofing, drainage, detailing, testing and protection all contribute to the final result.
This final section brings those decisions together so a homeowner can confidently evaluate terrace waterproofing contractors in Thane, compare quotations, understand warranty conditions and decide when repair is sufficient versus when complete re-waterproofing is more appropriate.
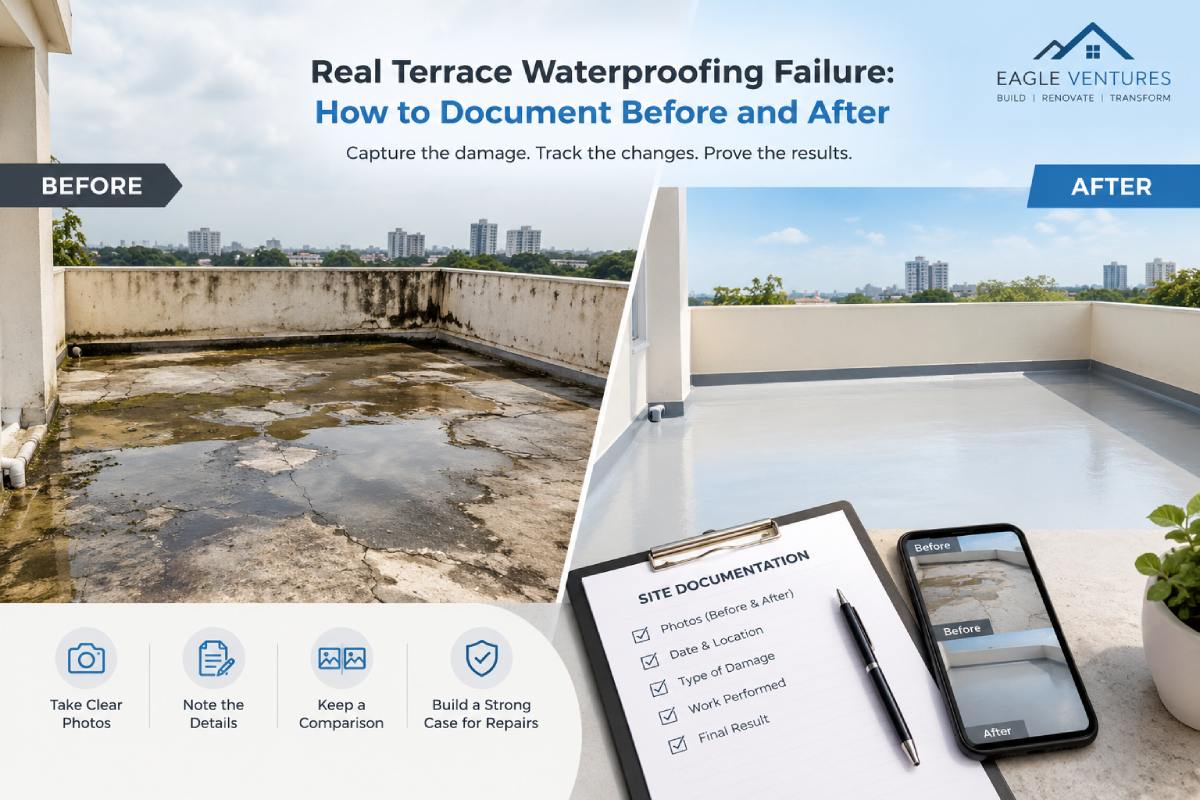
Real Terrace Waterproofing Failure: How to Document Before and After
One of the strongest ways to demonstrate waterproofing expertise is to show what actually happened on a real project. Instead of simply writing: “We provide high-quality waterproofing,” a useful project example should demonstrate:
What was wrong → How it was inspected → What caused the failure → What was repaired → What system was used → What the completed terrace looked like.
The attached strategy specifically recommends this Before → Inspection → Failure → Repair → After structure as an EEAT differentiator.
If Eagle Ventures has genuine project photographs and project information, this section should be populated with those actual details rather than invented measurements, costs or outcomes.
Before: What Was Visible?
The first stage should document the visible problem.
For example, depending on the actual project, photographs may show:
- Cracked terrace surface
- Peeling waterproofing
- Water ponding
- Damaged joints
- Loose tiles
- Damp parapet areas
- Ceiling stains below the terrace
The important point is to document the condition before any repair begins. This creates a genuine baseline for evaluating the work.
Inspection: What Was Found?
The next stage should explain what the contractor discovered during inspection.
A proper project report can include:
- Condition of the existing waterproofing
- Crack locations
- Drainage condition
- Ponding areas
- Parapet junctions
- Pipe penetrations
- Existing tile condition
- Previous repair areas
This makes the case study educational rather than promotional. It shows homeowners how a professional waterproofing assessment actually works.
Failure: What Caused the Leakage?
The project should then explain the identified failure mechanism.
Depending on the actual site, this might be:
- Failed previous waterproofing
- Open cracks
- Poor drainage
- Damaged joint
- Failed pipe penetration
- Poor parapet detailing
- Combination of multiple issues
The case study should only identify causes that were actually established during the project. If the evidence does not establish a single cause, the article should say that multiple contributing factors were identified rather than presenting an assumption as a fact.
Repair: What Was Done?
The repair section should explain the work sequentially.
For example:
Surface preparation
↓
Damaged material removal
↓
Crack treatment
↓
Drain/junction treatment
↓
Waterproofing application
↓
Curing
↓
Testing
↓
Protection
This is much more useful to a potential customer than simply mentioning the waterproofing product.
After: What Changed?
The final photographs should show the completed work.
Where possible, document:
- Finished terrace
- Repaired cracks
- Completed waterproofing
- Drainage details
- Parapet treatment
- Protective layer
- Repaired ceiling below
The goal is to show the complete outcome, not just a freshly coated surface.
How to Select Terrace Waterproofing Contractors in Thane
Choosing the right contractor is one of the most important decisions in the entire project. A waterproofing contractor should be evaluated on more than product knowledge.
The contractor needs to understand the relationship between:
Water → Surface → Drainage → Cracks → Joints → Waterproofing → Protection
If one of these is ignored, the final solution may be incomplete.
What a Good Waterproofing Contractor Should Do Before Giving a Final Quote
A professional contractor should ideally inspect the site before providing a detailed final quotation.
The inspection should consider:
- Terrace size
- Existing finish
- Waterproofing condition
- Cracks
- Drainage
- Ponding
- Parapets
- Pipe penetrations
- Existing repairs
- Accessibility
After that, the contractor should explain the recommended scope. A quotation prepared after this process is generally easier to evaluate than a generic price sent without a site visit.
What Should Be Included in a Terrace Waterproofing Quotation?
A professional quotation should clearly describe the scope. At minimum, look for:
- Area: What terrace area is being waterproofed?
- Existing Surface: What is currently present?
- Preparation: How will the surface be prepared?
- Repairs: Are cracks, joints and damaged areas included?
- Waterproofing System: What system is being installed?
- Application: How will the system be applied?
- Drainage: Are drains and ponding areas addressed?
- Detailing: Are parapets and pipe penetrations included?
- Testing: How will the completed system be tested?
- Protection: What protects the waterproofing after installation?
- Debris: Who removes demolition waste?
- Warranty: What exactly is covered?
This structure makes it much easier to compare waterproofing services near me or waterproofing contractors near me without relying solely on price.
Contractor Quotation Comparison Checklist
When comparing two or three quotations, use the same checklist.
| Question | Contractor A | Contractor B | Contractor C |
|---|---|---|---|
| Site inspection | ✓ / ✗ | ✓ / ✗ | ✓ / ✗ |
| Leakage diagnosis | ✓ / ✗ | ✓ / ✗ | ✓ / ✗ |
| Surface preparation | ✓ / ✗ | ✓ / ✗ | ✓ / ✗ |
| Crack treatment | ✓ / ✗ | ✓ / ✗ | ✓ / ✗ |
| Drain treatment | ✓ / ✗ | ✓ / ✗ | ✓ / ✗ |
| Parapet treatment | ✓ / ✗ | ✓ / ✗ | ✓ / ✗ |
| Pipe detailing | ✓ / ✗ | ✓ / ✗ | ✓ / ✗ |
| Waterproofing system specified | ✓ / ✗ | ✓ / ✗ | ✓ / ✗ |
| Testing | ✓ / ✗ | ✓ / ✗ | ✓ / ✗ |
| Protection | ✓ / ✗ | ✓ / ✗ | ✓ / ✗ |
| Warranty terms | ✓ / ✗ | ✓ / ✗ | ✓ / ✗ |
The cheapest quotation is not necessarily the best quotation. The most useful quotation is the one where you can clearly understand what you are paying for.
Red Flags When Hiring Waterproofing Contractors
Certain warning signs should make homeowners ask additional questions.
Red Flag 1 - No Site Inspection
If a contractor gives a final price without seeing the terrace, ask how the condition was assessed.
Red Flag 2 - Only Talks About Chemical
If the contractor spends the entire discussion describing the chemical but never discusses drainage, cracks, joints or preparation, ask for a complete methodology.
Red Flag 3 - “This Chemical Works Everywhere”
Different terraces have different conditions. A universal product claim should be examined carefully.
Red Flag 4 - Extremely Low Price
A low price is not automatically bad. But ask what has been excluded.
Red Flag 5 - No Written Scope
Verbal promises are difficult to verify later.
Red Flag 6 - No Testing Discussion
Ask how the completed system will be evaluated.
Red Flag 7 - Warranty Is Only a Number
A “five-year warranty” means little if the exclusions and conditions are unclear.
Red Flag 8 - No Explanation of Existing Waterproofing
If there is an old system, the contractor should explain whether it is being retained, repaired or removed.
Should You Hire a General Civil Contractor or a Waterproofing Specialist?
The answer depends on the scope of the project. A waterproofing specialist may be appropriate for a focused terrace waterproofing project.
A civil contractor may be more suitable when the project also involves:
- Major demolition
- Masonry
- Slope correction
- Concrete repairs
- Flooring
- Terrace reconstruction
In larger projects, coordination becomes particularly important. If several civil activities are required, homeowners should understand who is responsible for coordinating them.
When Turnkey Execution Can Be Useful for Terrace Renovation
If terrace work is part of a larger home renovation, a turnkey contractor may coordinate:
- Civil work
- Waterproofing
- Plumbing
- Flooring
- Electrical
- Interior restoration
This can reduce coordination gaps between different teams.
For example:
Waterproofing → Protective layer → Flooring → Interior ceiling repair
The sequence needs to be coordinated so that one team does not damage the previous team's work.
Waterproofing and Interior Renovation Should Be Coordinated
Suppose a terrace above a bedroom is leaking.
The homeowner may also be planning:
- Ceiling design
- Painting
- Electrical work
- Furniture installation
The waterproofing should be addressed before final interior finishing.
Otherwise:
Ceiling repair → Painting → Terrace leakage returns → Ceiling becomes damp again → Painting must be repeated
This creates avoidable expenditure.
Waterproofing Before Interior Work - Correct Sequence
A practical renovation sequence is:
- Step 1: Identify the leakage.
- Step 2: Inspect the terrace.
- Step 3: Complete terrace waterproofing.
- Step 4: Test the system.
- Step 5: Allow the affected interior area to dry appropriately.
- Step 6: Repair damaged plaster.
- Step 7: Complete painting.
This ensures the interior repair follows the actual resolution of the moisture problem.
What Happens If Waterproofing Is Done but the Ceiling Remains Damp?
A ceiling may not immediately return to normal after the water source has been corrected. Previously absorbed moisture may require time to dry.
The contractor should therefore distinguish between: Active leakage and Residual dampness.
If dampness continues or worsens after an appropriate drying period, the terrace and other possible moisture sources should be reassessed.
Do not automatically assume that every remaining stain means the waterproofing has failed.
Post-Waterproofing Maintenance
After the waterproofing project is completed, maintenance still matters.
The terrace should be inspected periodically for:
- Blocked drains
- New cracks
- Ponding
- Damaged surface
- Construction debris
- Pipe leakage
- Damaged protective layers
A waterproofing system can be compromised by later drilling, construction or physical damage.
Therefore, future work on the terrace should be planned carefully.
Monsoon Maintenance Checklist
Before the monsoon:
- Clean all drains
- Remove leaves and debris
- Inspect cracks
- Check parapet junctions
- Inspect pipe penetrations
- Look for ponding
- Check old waterproofing
- Inspect ceiling below
- Check previous repair areas
During the monsoon:
- Observe recurring leakage
- Photograph new damp areas
- Note where water accumulates
- Check drainage after heavy rainfall
After the monsoon:
- Inspect damaged areas
- Record recurring leakage
- Plan repairs before the next rainy season
Do Not Drill Into a Waterproofed Terrace Without Planning
One common post-completion mistake is installing:
- Equipment
- Supports
- Railings
- Solar structures
- Fixtures
- Pipes
by drilling through the waterproofed surface without considering the waterproofing system. Any penetration can create a potential leakage path. Before making modifications, the waterproofing contractor or relevant technical professional should determine how the penetration can be properly detailed.
Waterproofing Is Not Only About Rainwater
Although terrace leakage is commonly associated with rainfall, water-related problems can have several sources.
For example:
- Plumbing
- Drainage
- Condensation
- Pipe penetrations
- Structural cracks
- Adjacent wet areas
This is why diagnosis matters. If a ceiling remains damp after terrace waterproofing, the contractor should investigate whether another source is contributing to the moisture.
When Should You Waterproof a Terrace?
There are two broad situations.
Preventive Waterproofing: The terrace has not developed major leakage, but inspection shows deterioration or the homeowner wants to address vulnerabilities before the monsoon.
Corrective Waterproofing: Leakage, dampness, ponding or visible waterproofing failure already exists. Corrective waterproofing usually requires more detailed diagnosis because the contractor needs to determine what failed and why.
Terrace Waterproofing Before Monsoon
Pre-monsoon work can be useful because it gives contractors an opportunity to inspect and correct vulnerable areas before prolonged rainfall.
The planning process should begin early enough to allow:
- Inspection
- Surface preparation
- Repairs
- Waterproofing
- Curing
- Testing
- Protection
Trying to complete waterproofing immediately before a major rainfall event can create scheduling and drying challenges.
How Homeowners Can Prepare for a Waterproofing Inspection
Before the contractor arrives, collect information about:
- When leakage started
- Which rooms are affected
- Whether leakage occurs only after heavy rain
- Whether previous repairs were done
- When the terrace was last waterproofed
- Whether tiles were replaced
- Whether drains frequently block
Photographs taken during or immediately after rainfall can also help document the problem. This information gives the contractor a better understanding of the leakage history.
Final Terrace Waterproofing Hiring Checklist
Before signing the contract, confirm:
Inspection
- Site inspected
- Leakage source discussed
- Existing waterproofing assessed
- Drainage checked
Scope
- Surface preparation specified
- Crack repair included
- Joint treatment included
- Parapet treatment included
- Pipe penetration treatment included
System
- Waterproofing system specified
- Product/system requirements documented
- Number of layers or membrane specification stated
- Application process explained
Quality
- Curing requirements explained
- Testing included
- Protection included
- Final inspection planned
Commercial
- Area measured
- Unit/rate specified
- Additional work process defined
- Payment milestones agreed
- Warranty documented
Final Decision: Which Terrace Waterproofing Solution Should You Choose?
There is no responsible way to say:
- “PU is always the best.”
- “APP membrane is always the best.”
- “Acrylic is sufficient for every terrace.”
The correct waterproofing solution depends on the actual property and the scope of required roof waterproofing services.
The selection of terrace waterproofing solutions should consider:
Surface → Leakage → Movement → Drainage → Existing Waterproofing → Terrace Finish → Exposure → Budget → Expected Use
Only after these factors are understood should the waterproofing system be finalized.
Complete Terrace Waterproofing Decision Matrix
| Your Situation | What to Prioritize |
|---|---|
| New terrace | Preventive waterproofing + drainage |
| Old terrace with repeated leakage | Complete inspection |
| Localized leakage | Source-specific repair |
| Widespread leakage | Full system assessment |
| Severe ponding | Slope/drainage correction |
| Cracked terrace | Crack diagnosis + suitable system |
| Loose tiles | Tile/substrate assessment |
| Failed old coating | Existing-system assessment |
| Terrace above finished interiors | Waterproofing before interior repair |
| Pre-monsoon renovation | Inspection + timely execution |
| Commercial/large terrace | System specification + project supervision |
The Complete Terrace Waterproofing Lifecycle
A professional waterproofing project can now be understood as one complete lifecycle:
1. Problem Identification: Identify visible leakage, dampness, cracks or ponding.
↓
2. Site Inspection: Inspect the terrace and affected interior.
↓
3. Diagnosis: Identify the likely source and contributing factors.
↓
4. Cost Assessment: Determine quantities and required activities.
↓
5. System Selection: Select the appropriate waterproofing method.
↓
6. Surface Preparation: Clean, remove defective material and repair the substrate.
↓
7. Waterproofing: Apply the specified system.
↓
8. Detailing: Treat drains, parapets, joints and penetrations.
↓
9. Testing: Verify the completed waterproofing where applicable.
↓
10. Protection: Protect the finished waterproofing system.
↓
11. Handover: Provide documentation and warranty terms.
↓
12. Maintenance: Maintain drainage and inspect vulnerable areas.
This lifecycle is what turns terrace waterproofing services into a structured professional solution.
Frequently Asked Questions About Terrace Waterproofing
-
There is no single waterproofing system that is best for every terrace. Depending on the surface and project requirements, options can include cementitious, acrylic, polyurethane, bituminous, APP and SBS systems. The appropriate solution should be selected after inspecting the terrace, identifying the leakage cause, checking drainage and assessing the existing waterproofing.
-
The cost depends on the terrace area, existing surface, condition of previous waterproofing, crack repair, tile removal, slope correction, drainage, waterproofing system, labour and protection requirements. For this reason, an item-wise quotation after site inspection is more useful than relying on one generic per-square-foot figure.
-
In some situations, yes. If the existing tiles are stable and the substrate is suitable for a compatible waterproofing system, certain approaches may be possible without removing the entire tiled surface. However, loose tiles, severe leakage, poor drainage or extensive failure of the underlying waterproofing may make removal and substrate repair more appropriate.
-
Neither should automatically be considered better for every terrace. PU and acrylic systems have different characteristics and application requirements. The appropriate choice depends on the substrate, exposure, movement, existing surface, preparation requirements and specified system.
-
Not necessarily. Terrace waterproofing chemicals are only one component of a waterproofing system. If cracks, poor drainage, failed joints, pipe penetrations or inadequate surface preparation are ignored, the leakage can return even after a new coating is applied.
-
The lifespan depends on the waterproofing system, installation quality, surface preparation, exposure, drainage, maintenance and subsequent damage. There is no universal lifespan applicable to every terrace.
-
Generally, the water source should be addressed first. Repairing and painting the ceiling before fixing active terrace leakage can result in repeated damage. Once the source is corrected and the affected area has dried appropriately, the interior plaster and paint can be repaired.
-
Warning signs include ceiling dampness, stains, peeling paint, terrace cracks, water ponding, loose tiles, damaged grout, mold, efflorescence, damp smell, parapet seepage, repeated monsoon leakage and peeling waterproofing coating. One sign alone does not establish the exact cause, so a professional inspection is recommended.
-
If poor slope is causing significant water ponding, it should be assessed before finalizing the waterproofing system. Water should be able to move toward the designated drainage outlets. Waterproofing does not eliminate the need for proper terrace drainage.
-
Sometimes, but only after assessing the existing system. The old coating or membrane needs to be sufficiently sound and compatible with the proposed system. If the old waterproofing is extensively peeling, poorly bonded or deteriorated, it may need to be removed or otherwise treated according to the new system requirements.
-
Drain maintenance should be performed regularly, particularly before and during the monsoon. Leaves, dust, construction debris and other materials can block outlets and cause water to accumulate on the terrace.
-
The homeowner should understand the exact scope of coverage, duration, workmanship conditions, exclusions, maintenance requirements and process for reporting a problem. A warranty should not be evaluated solely by the number of years printed on the quotation.
-
Look for contractors who provide site inspection, explain the leakage cause, specify the waterproofing system, describe surface preparation, address drains and vulnerable junctions, explain testing and provide clear warranty terms. Local availability is useful, but technical capability and transparency should remain important selection factors.
-
If the terrace has visible cracks, ponding, deteriorated waterproofing or previous leakage, addressing the issue before prolonged rainfall is generally preferable to waiting for active leakage. Preventive inspection can also identify vulnerabilities before they become larger problems.
-
Repeated leakage can occur when the original problem was not correctly diagnosed or when important factors such as cracks, drainage, joints, parapets or pipe penetrations were not properly addressed. Poor surface preparation or incorrect application can also affect performance.
-
The terms are often used interchangeably in residential discussions, but roof waterproofing services and terrace work depend on the construction and use of the roof or terrace. A professional assessment should consider the actual surface, drainage, access and existing construction rather than relying on terminology alone.
Conclusion: Choosing the Right Terrace Waterproofing Solution in Thane
A terrace should not be waterproofed simply because someone recommends a particular chemical. The right approach starts with understanding the problem.
Leakage → Inspection → Diagnosis → Surface Assessment → Cost & Scope → System Selection → Preparation → Waterproofing → Detailing → Testing → Protection → Warranty → Maintenance
This approach gives homeowners a much better basis for evaluating terrace waterproofing solutions in Thane.
If you are comparing terrace waterproofing contractors, do not compare only the price per square foot. Compare the inspection process, preparation, waterproofing system, crack treatment, drainage work, detailing, testing, protection and warranty. Most importantly, do not wait for a minor terrace defect to become a major interior repair. A damp ceiling, recurring stain, cracked terrace, ponding area or failed old waterproofing is a reason to investigate the terrace-not simply repaint the affected room.
For homeowners searching for terrace waterproofing contractors in Thane, waterproofing contractors near me, waterproofing services near me or roof waterproofing services, the strongest decision is one based on a documented inspection and a clearly defined scope of work. The goal is not merely to cover the terrace. The goal is to identify why water is getting through and build a waterproofing system designed around that problem.
You May be Interested in
-
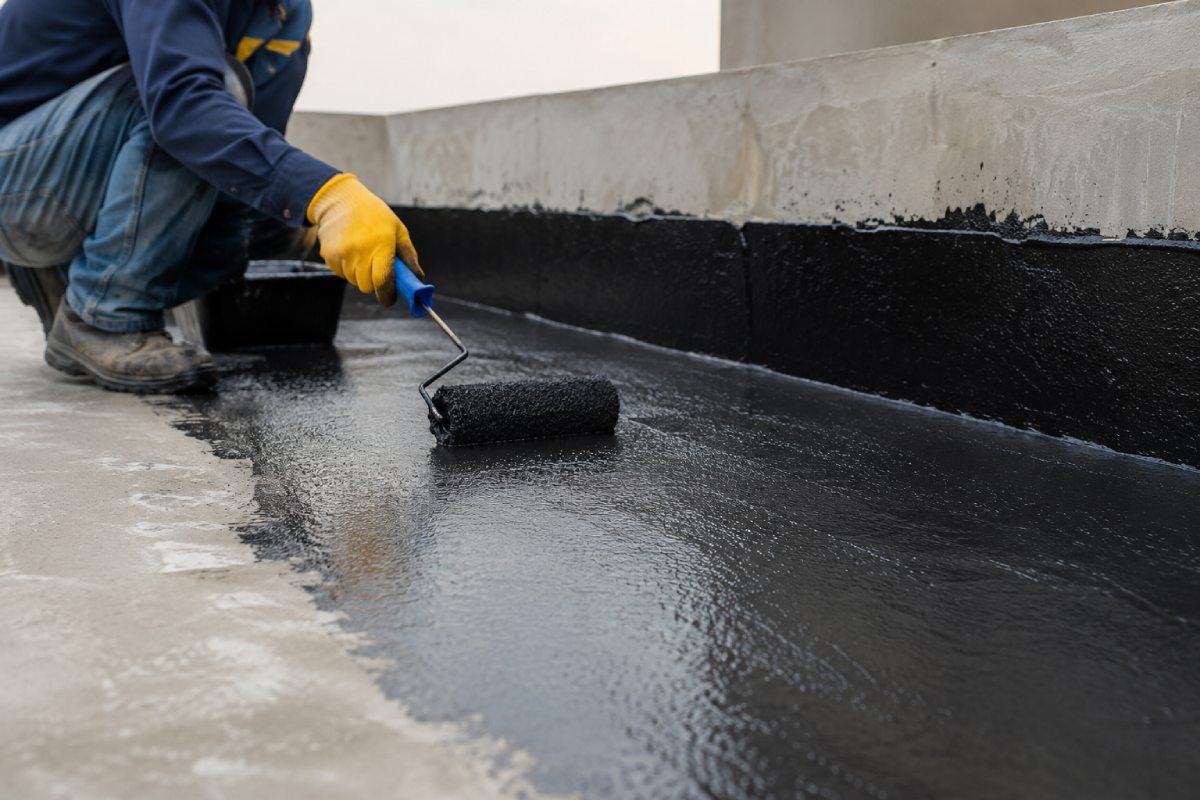 August 06, 2026
Waterproofing Contractors in Thane: Complete Guide Before Home Renovation
Understand bathroom, terrace, and wall waterproofing systems before starting interior finishes.....
Read More... -
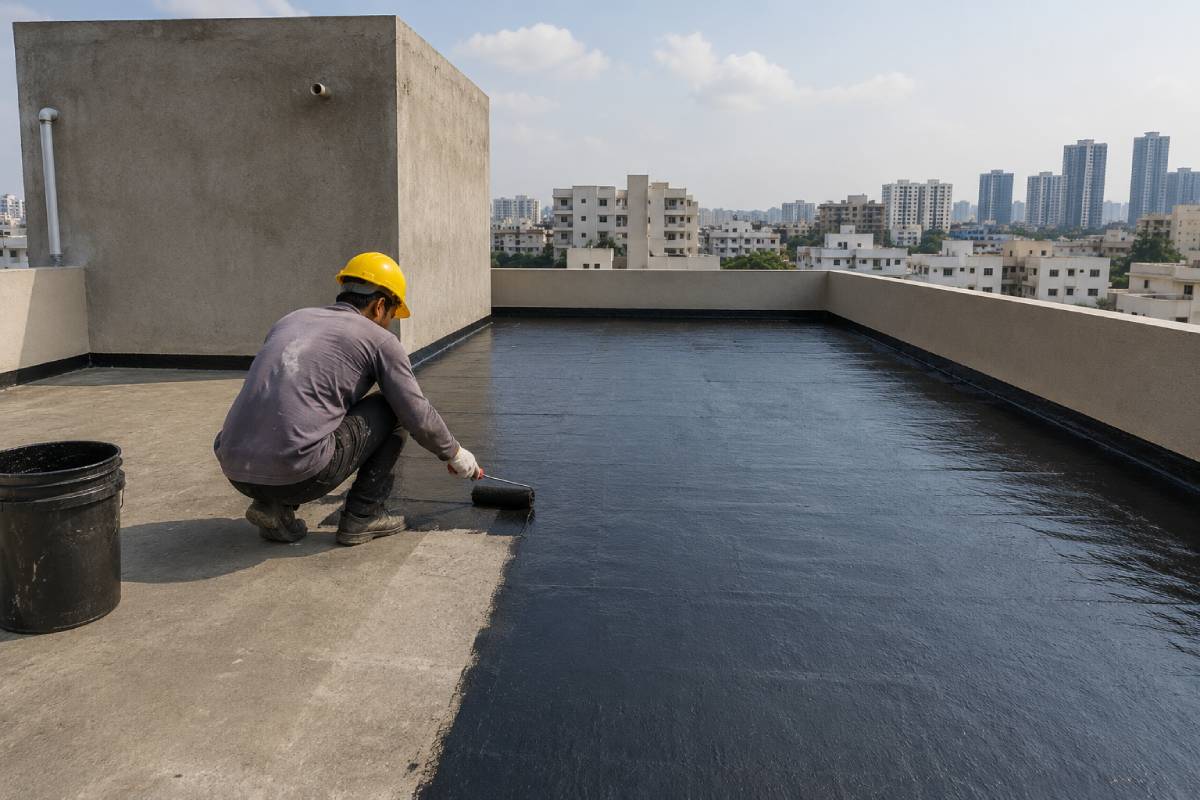 July 15, 2026
Terrace Waterproofing Solutions for Residential Buildings
Explore step-by-step methodologies to protect residential roofs and terraces from persistent leaks.....
Read More... -
 August 24, 2026
Civil Work Cost in Thane: Complete 2026 Guide & Rates
Learn about civil work cost in Thane, including masonry, plastering, demolition, waterproofing, and pre-interior civil work.....
Read More...
FREE CONSULTATION
Talk To Our Expert

About Us
Founded in 2016. Eagle Ventures has estabilished itself as one of the greatest and prestigious providers of construction focused interior renovation services and building.